On a website, usually, the most expensive resource is Javascript. The most expensive source after javascript is images for a browser. Visual optimization is one of the most important factors for page loading speed and user experience along with SEO. One of the quick actions that can be taken to make a web page faster is visual optimization. There are many paid programs to do this in bulk. In fact, you can do this much better with a few lines of Python code.
What will you learn:
- How to compress a single image in different methods.
- How to compress images in bulk with a few lines of code.
Which Libraries can be used for the Optimization of Images?
- Pillow: This is a destructive image optimization library which means that it destroys the original copy of the image during optimization. It is built on PIL (Python Image Library) by Alex Clark. Thanks to PIL, you can draw images, change the color of the image, or you can write text on an image.
- img4web: This library follows the Yahoo Best Practices for Speeding Up Your Web Site for image optimization. It uses lossless compression which means that it doesn’t affect the quality of the image.
- Tinify: This is the TinyPNG and TinyJPG Python Library. It is actually a Python API for the TinyPNG or TinyJPG Members. You can also use it without being a member in a limited version.
- Pyguetzli: It is built on Google’s Guetzli Library which is for optimizing JPEG Files by between 20% and 30%.
- Scikit-image: This is a complex library. Its main purpose is not optimizing images, but still it can be used for image-optimization. You can turn an image into an array and determine which pixels can be deleted from the image via an array of numbers.
- Smush.py: It uses lossless image optimization. It is based-on Yahoo’s smush.it service.
- PYCloudinary: It is based-on Cloudinary’s Image Optimization service. It is easy to use and gives flexibility for different options to optimize images.
In this article, we will perform an example of optimization with all of these Python Libraries for image optimization.
To learn more about Python SEO, you may read the related guidelines:
- How to resize images in bulk with Python
- How to perform DNS Reverse Lookup thanks to Python
- How to perform TF-IDF Analysis with Python
- How to crawl and analyze a Website via Python
- How to perform text analysis via Python
- How to test a robots.txt file via Python
- How to Compare and Analyse Robots.txt File via Python
- How to Analyze Content Structure of a Website via Sitemaps and Python
Note: In this guideline, we haven’t compress the images so that you can see the pixel differences in images in a better condition.
How to Optimize Images with Pillow Python Library
Before the installiation, remember that PIL (Python Image Library) and Pillow can’t be in the same environment. You need to delete one of them.
The code line for the installing Pillow:
pip install pillowIf you have Pillow already, you may upgrade it with the code below:
pip install --upgrade pillowBefore the start coding, we can write the Psuedo Codes (Sentences in a coding logic) below to make them more clear for everyone.
5 Steps to Optimize an Image with Python’s Pillow Library:
- Import the necessary Libraries
- Open the Image file and assign it to a variable.
- Audit the size of the image to see whether it is enough for your usage purpose or not.
- Reduce the size with the most convenient method for quality.
- Reduce the Image’s KB along with its quality.
- Try to optimize more without losing more quality.
Now we can start to code.
from PIL import Image
import os
image_path = r'C:\Users\Koray Tuğberk GÜBÜR\Desktop\python_all\Pillow'
image_loc = r'\big-garry-image.png'
image = Image.open(image_path + image_loc)
print(image.format, image.size, image.mode, os.stat(image_path + image_loc).st_size)
#os.stat().st_size is to show the size of the file on the disk.
Output >>>
PNG (600, 569) RGBA 416921
Here, we simply extracted the original file’s kind, width and height ratio, color system and its size in bytes.
Our file is a PNG Image, with 600 width and 569 height, RGBA Color system and 416.9 KB.
Now, simply we can start optimizing our image step by step.
new_image = image.resize((500,469), resample=1)Simply, we are resizing our image and assign it to the “new_image” variable to call later. Resample is an attribute for the resize method. You may choose the resampling method for the image. Resample=1 means that we will use the “Image.Nearest” filter here. It will choose the closest pixel to the one which is deleted.
new_image_path = r'C:\Users\Koray Tuğberk GÜBÜR\Desktop\python_all\Pillow'
new_image_loc = r'\big-garry-image-just-resized.png'
new_image.save(new_image_path + new_image_loc)
print(new_image.format, new_image.size, new_image.mode, os.stat(new_image_path + new_image_loc).st_size)
OUTPUT>>>
PNG (600, 569) RGBA 416921
None (500, 469) RGBA 246666
As you may see here we have decreased our image’s size with only resizing by %43. Now, let’s change the image filter method here.
new_image = image.resize((500,469), resample=4)
new_image_path = r'C:\Users\Koray Tuğberk GÜBÜR\Desktop\python_all\Pillow'
new_image_loc = r'\big-garry-image-just-resized.png'
new_image.save(new_image_path + new_image_loc)
print(new_image.format, new_image.size, new_image.mode, os.stat(new_image_path + new_image_loc).st_size)
OUTPUT>>>
None (500, 469) RGBA 202864
Resample=4 is equal to Image.BOX
The other Resample Methods below:
- Image.NEAREST (0)
- Image.LANCZOS (1)
- Image.BILINEAR (2)
- Image.BICUBIC (3)
- Image.BOX (4)
- Image.HAMMING (5)
You can see their effects for performance and quality below:
| Filter | Downscaling quality | Upscaling quality | Performance |
|---|---|---|---|
NEAREST | ⭐⭐⭐⭐⭐ | ||
BOX | ⭐ | ⭐⭐⭐⭐ | |
BILINEAR | ⭐ | ⭐ | ⭐⭐⭐ |
HAMMING | ⭐⭐ | ⭐⭐⭐ | |
BICUBIC | ⭐⭐⭐ | ⭐⭐⭐ | ⭐⭐ |
LANCZOS | ⭐⭐⭐⭐ | ⭐⭐⭐⭐ | ⭐ |
Every filter has a different methodology for resampling. I usually use BOX which is downscaling quality for performance but still preserves the visual’s clarity.
We also have another attribute for resizing and image optimization, it is reducing the gap. It is reducing the size with a faster methodology. You may see the difference between the images below:
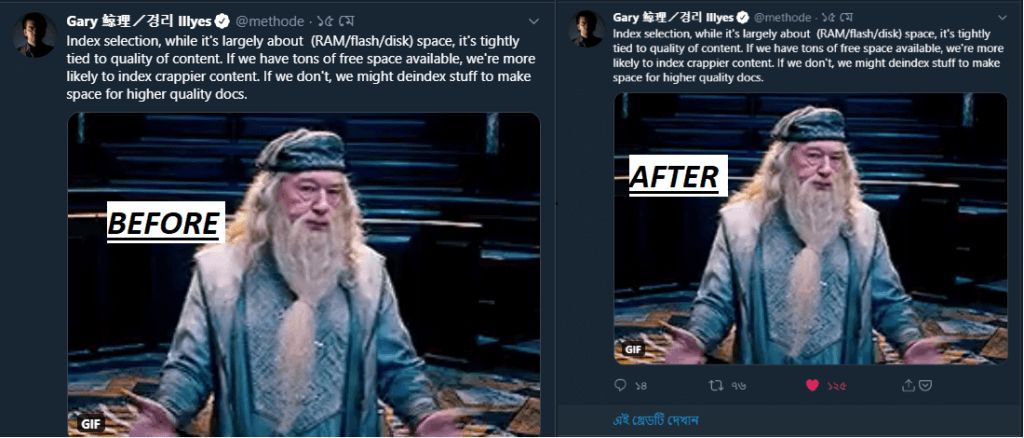
This is not the only method to optimize an image with Python’s Pillow Library. We can also optimize an image without changing its size or using resize() method. Let’s make an example for also save() method.
path = r'C:\Users\Koray Tuğberk GÜBÜR\Desktop\python_all\Pillow'
image_1 = r'\google-1.jpg'
image_2 = r'\google-2.jpg'
compressed_image = path + image_2
uncompressed_image = Image.open(path + image_1)
print(uncompressed_image.format, uncompressed_image.size, uncompressed_image.mode, os.stat(path + image_1).st_size)

OUTPUT>>>
JPEG (570, 320) RGB 47139
uncompressed_image.save(compressed_image, optimize=True, quality=60)
print(compressed_image.format, compressed_image.size, compressed_image.mode, os.stat(path + image_2).st_size)

OUTPUT>>>
JPEG (570, 320) RGB 25960
Here, we have opened the image “google-1.jpg” with Image.open() function.
We have created an alternate path for the image which will be optimized. Then, we have printed out their Format, Size, Color Code, and bytes. We have compressed the image %100 without changing the size. Let’s see the outcome:

How to Optimize Images in Bulk with Python’s Pillow Library
We have performed a small image optimization with Pillow Library for a single image. We have also resized it. So, how can we optimize and resize images in bulk with Pillow?
Before performing a bulk image optimization, be sure that you are in the right directory in your terminal.
print(os.getcwd())
OUTPUT>>>
C:\Users\Koray Tuğberk GÜBÜR\Desktop\python_all\Pillow
I want to perform this bulk image optimization process in a subdirectory, that’s why I will open a new file here with Python and enter it.
absFilePath = os.path.abspath(__file__)
fileDir = os.path.dirname(os.path.abspath(__file__))
newFile = r'\bulk_opt'
path = os.path.join(fileDir + newFile)
os.mkdir(path)
cd bulk_opt
print(os.getcwd())

OUTPUT>>
C:\Users\Koray Tuğberk GÜBÜR\Desktop\python_all\Pillow\bulk_opt
Thanks to OS Module, first, we have created an Absolute Path variable which includes the file path of our Python Codes. Later, we have created a file directory variable which includes our Python file.
Lastly, we have created a new path for the file we want to create and then used it to create that file with os.mkdir() method. We have entered that file with the “cd” command and checked the current working directory with the “os.getcwd()” and it was correct.
Now, let’s check whether there is an image in the directory or not.
print(os.listdir())
OUTPUT>>>
['1.jpg', '2.jpeg', '3.jpeg', '4.jpeg', '5.jpeg', '6.jpeg']
We have 6 image files in the directory. We have put those images there manually but you can also download all images from a web entity with Python and move them in this directory also. But, this will be told in another guide.
Now, we can start to optimize these 6 images in bulk.
unopt_images = [file for file in os.listdir() if file.endswith(('jpg', 'jpeg'))]
print(f'Unoptimized images : {unopt_images}')
OUTPUT>>>
images : ['1.jpg', '2.jpeg', '3.jpeg', '4.jpeg', '5.jpeg', '6.jpeg']
Here, we have used List Comprehension method to prepare our images for a for loop process. We have taken into all images in a list for the same purpose. Now, we need to create our for loop.
for image in unopt_images:
    img = Image.open(image)
    img.save("Compressed_" + image, optimize=True, quality=60)
With only 3 lines of code, we have optimized all of the images by decreasing their quality 40 percent and also try to Optimize them more with “optimize=True” attribute.
The unoptimized images’ size in sum was 625 KB, we have compressed them to 534 KB. You will see an image example below for before and after situations.
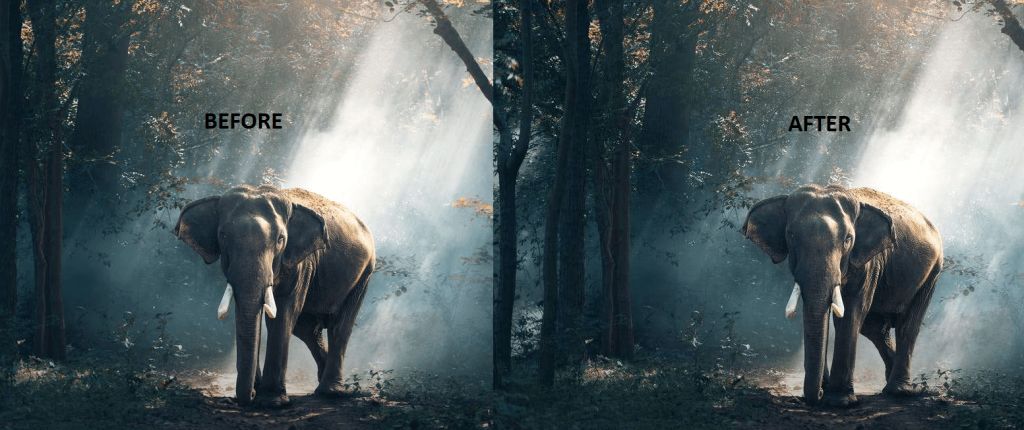
I know it is not a big compression rate. It is because we didn’t decrease the quality too much.
for image in unopt_images:
   img = Image.open(image)
   img.save("Double_Compressed_" + image, optimize=True, quality=35)
Now, we have decreased the quality a little bit more, let’s check the difference again.
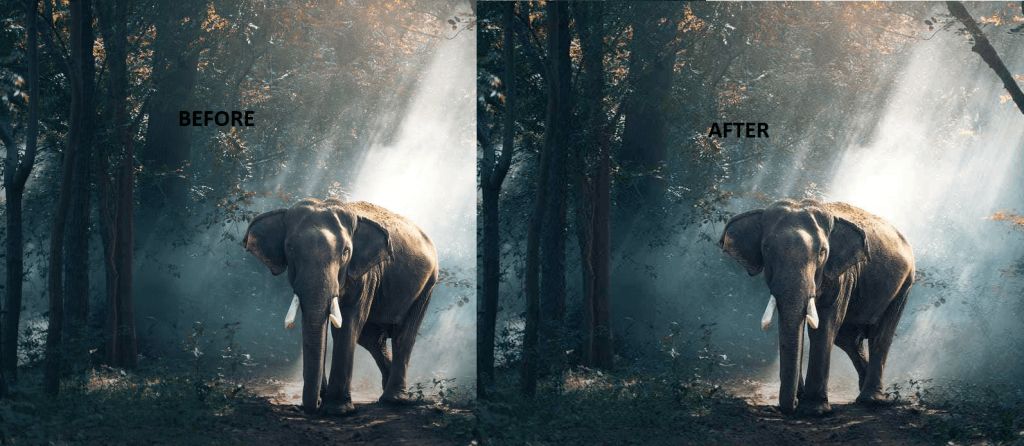
Also, we have another issue here, the image resolution. Resolution of this image:
print(f'New Compressed Image\'s Size: {img.size}')
#We have added a new line into our for loop.

OUTPUT>>>
New Compressed Image's Size: (1100, 825)
New Compressed Image's Size: (1099, 750)
New Compressed Image's Size: (1124, 750)
New Compressed Image's Size: (1125, 750)
New Compressed Image's Size: (1125, 750)
New Compressed Image's Size: (563, 750)
As we can see that most of those images are bigger than 1000 width and 600 height. We won’t need such big images for mobile or desktop devices unless you have a web service for visual communication or image stock market. Let’s try those optimizations with also resizing.
for image in unopt_images:
    img = Image.open(image)
    img = img.resize((800,500), resample=1)
    img.save("Double_Compressed_Resized" + image, optimize=True, quality=50)
Now let’s check the quality difference for Human Eyes or visual perception:

As you may see we have compressed it over %500 without a visual quality loss and we have resized it for our web usage purposes. With Python Pillow Library you can optimize millions of images in bulk with a few lines of code. Also, you can blur them or write text on images.
We have performed a detailed explonation for Pillow Library, let’s move to the next libraries for image optimization with Python. Since, we have showed every step in a detailed attidute, next sections will be more brief to show you more practical results efficiently.
How to Optimize Images with Python’s Pillow Optimize Images Library
If you don’t want to use all of the codes above, you can compress your images only with single line of code. Pillow Optimize Image Library is an extension of Pillow for optimizing images solely. I need to recommend you that it uses destructive image optimiziation, it means that the code will delete the original images and replace them with the optimized versions. So, you need to preserve the original ones if you want.
Install the optimize-images:
pip install pillow optimize-imagesGo to the folder where you stored your images and use the code below:
optimize-images ./This will optimize all of the images in the directory and replace them. It also uses lossy image compression, so we can see some difference between optimized and non-optimized versions.
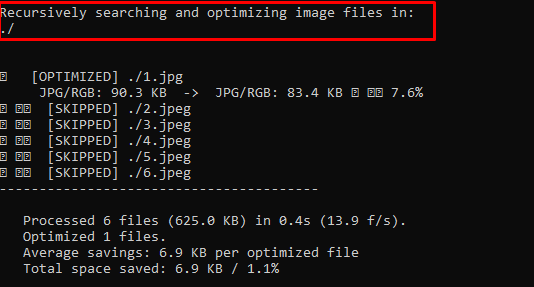
optimize-images -hThis will show you the all options you can use with this extension.
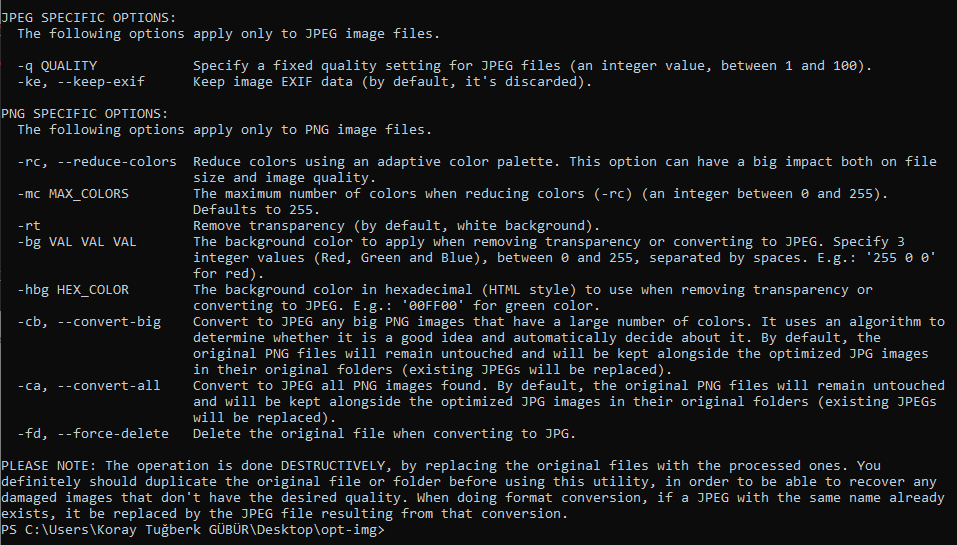
You can also change the types of the images or their color intensity or you may change their color type. Let’s check the difference.

How to Optimize Images with Python’s Pyguetzli Library
PyGuetzli is built on Google’s Guetzli Library which is a JPEG Encoder that performs an optimization between 20% and 30%. Its optimization level is equal to the libjpeg and it performs sequential, non-progressive compress for faster compression processes.
How to install PyGuetzli:
pip install pyguetzliAfter downloading it, we need to open a new file for new image compression.
import pyguetzli
import os

absPath = os.path.abspath(__file__)
dirPath = os.path.dirname(absPath)
newFile = 'guetzli'
path = os.path.join(dirPath, newFile)
os.mkdir(path)
os.chdir(path)
print(os.getcwd())

OUTPUT>>>
c:\Users\Koray Tuğberk GÜBÜR\Desktop\python_all\Pillow\guetzli
The code here simply creates a new file called as “guetzli” and then changes the working directory with “os.chdir(path)” and then check it with “os.getcwd()”.
We can see that now we are in our new file and we can start to compress images with PyGuetzli.
Normally, you can copy the images from another folder with Python with Shutil Library, but it is another day’s topic. After putting our images into the folder:
input_jpeg = open("6.jpeg", "rb").read()
optimized_jpeg = pyguetzli.process_jpeg_bytes(input_jpeg)

output = open("optimized-6.jpeg", "wb")
output.write(optimized_jpeg)
Here, we simply do same thing like in Pillow Library. First we are assigning the image file into a variable. Secondly, we assign the optimized image to another variable.
We are opening the optimized image with the mode of “wb” which is used for “write binary” while “rb” stands for “read binary”. In Python, you have to change the images into binary files to manipulate them.
Let’s check the difference:
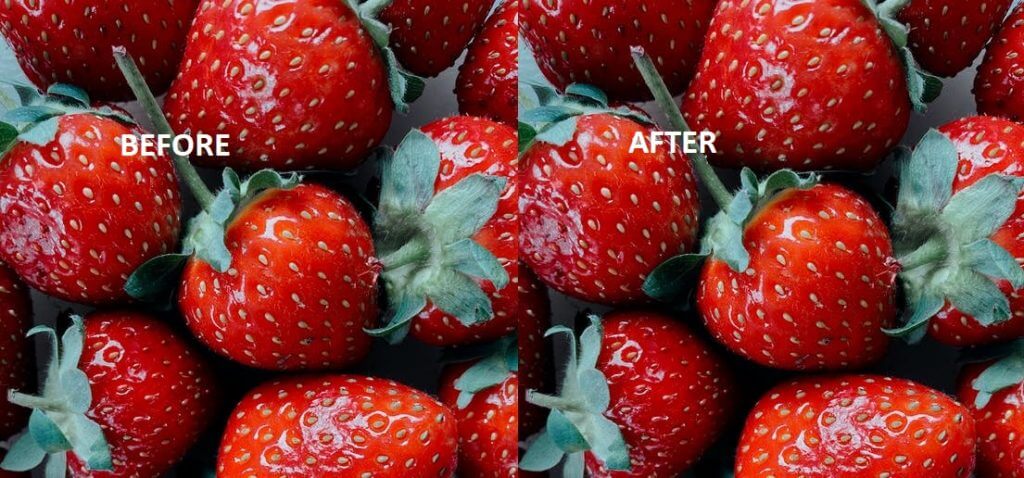
So, why PyGuetzli didn’t compress the image more? Because there are parameters in the “process_jpeg_bytes” method for determining the quality of the image. These are “bytes_in” and the “quality”. The default value for the quality attribute is 95. Let’s try again:
optimized_jpeg = pyguetzli.process_jpeg_bytes(input_jpeg, quality=50)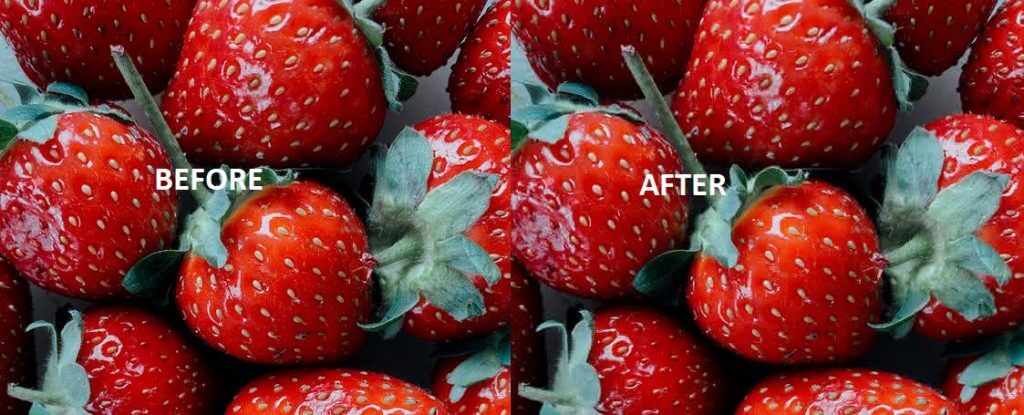
We have used “quality=50” but you can even decrease the quality more because PyGuetzli’s compression algorithm work fine. You can also use PyGuetzli via Pillow Library like below:
image = Image.open("6.jpeg")
optimized_jpeg = pyguetzli.process_pil_image(image, quality=50)
You can also resize the images with PyGuetzli. You may follow the below for doing the same thing in bulk:
for image in unopt_images:
    img = open(image, "rb").read()
    img_opt = pyguetzli.process_jpeg_bytes(img, quality=30)

    output = open(img_opt, "wb")
    output.write(img_opt)
The next sections will be about other Image Manipulation and Optimization libraries in Python, we will show what can be done on the behalf of those purposes in short.
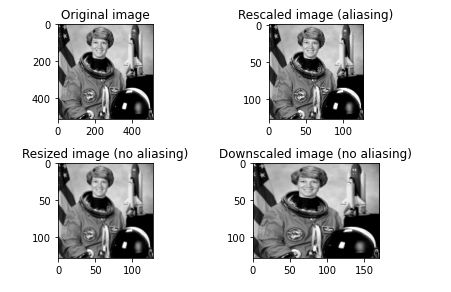
How to Optimize Images with Python’s Scikit-image Library
Scikit-image is actually not only for optimizing images, it is way more complicated and comprehensive for scientific purposes. The following can be done with Scikit-image:
- Clarifying a blurry image in the most logical way.
- Subtract the number of objects in an image.
- Manipulating Color Structure
- How to paint an image with its edges only
- Convert images to the heatmap
- Draw shapes according to specific math formulas
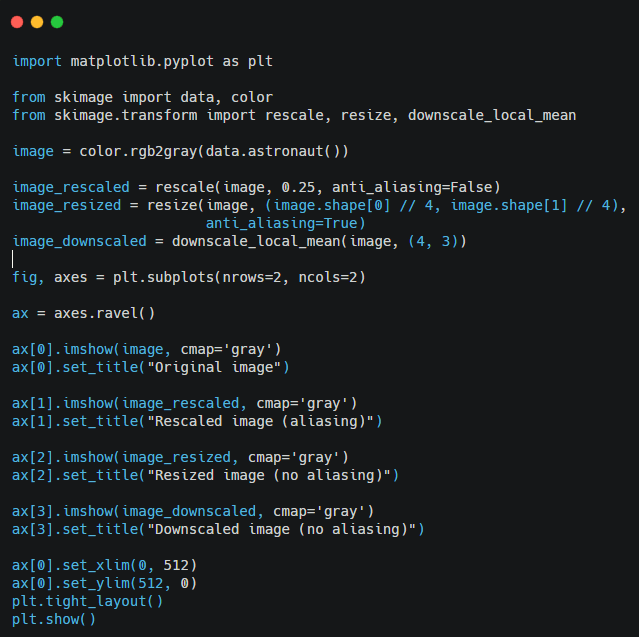
Actually, there are plenty of more things that can be done with Scikit-image. You may see an example at below:
What More Can Be Done for Visual Optimization with Python?
In this article, we tried to elaborate as much as possible while showing Python’s code structure. While practicing in libraries such as Scikit-image, Pyguetzli, Pillow, we gave information about many libraries such as PyCloduinary, Tinify, Smushy, im4web, by explaining their differences. Image optimization is one of the most important facts for Page Speed, while it sometimes takes too long to edit a photo, with Python, it is possible to realize both resizing and pixel reduction in millions of photos in a very short time.
In the following process, we will talk about different points that can be done in the name of Python and Images, and Page Speed and SEO.
- Sliding Window - August 12, 2024
- B2P Marketing: How it Works, Benefits, and Strategies - April 26, 2024
- SEO for Casino Websites: A SEO Case Study for the Bet and Gamble Industry - February 5, 2024

